
Hand-wiring a USB & Bluetooth keyboard powered by Python
This post is a step by step guide to hand-wire a mechanical keyboard. The keyboard supports USB and Bluetooth. More importantly, it is powered by Python. Before making this keyboard, I knew Python can be used in a microcontroller thanks to MicroPython and its variant CircuitPython. But I did not know Python can work so well and be so powerful in a keyboard. It's beyond my expectation. Hope you also enjoy it.
Table of Contents
- Materials
- Tools
- 1. Install Stabilizers
- 2. Mount Switches
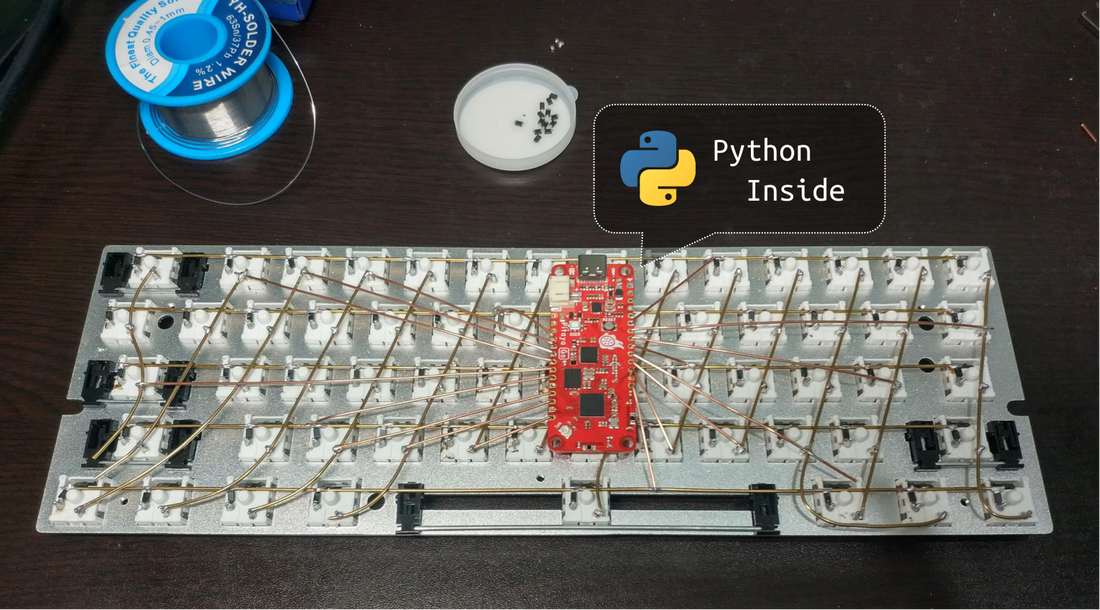
- 3. Solder Keyboard Matrix
- 4. Connect Keyboard Matrix to Pitaya Go
- 5. Setup Python

Materials
- 0.8mm brass wire
- 61+ mechanical switches
- keybaord plate
- plate mount stabilizers
- 61+ diodes for anti-ghost
- Pitaya Go
Tools
- soldering iron
- solder alloy
- tweezer
- multimeter
1. Install Stabilizers
At first, we should install stabilizers into the keyboard plate. To make the keyboard less noisy, we can lubricate the stabilizers with grease.

2. Mount Switches
Mount the mechanical switches to the plate.

3. Solder Keyboard Matrix
The keyboard matrix has 5 rows and 14 columns, each switch has two pins to connect to a row and a column. First, use a brass wire as a row and solder it with a diode. Second, solder the diode with a switch's row pin. After soldering all rows, we put something as a spacer on top of the row wires, and then solder the column wires with the column pins of these switches. By removing the spacer, the rows and columns are crossed in 3D space and are avoid to be shorted. We'd better use a muiltmeter to check if rows and columns are shorted and each diode's direction is correct.


4. Connect Keyboard Matrix to Pitaya Go
Connect each row and each column to an IO of the board Pitaya Go. When ardware is ready now, check if rows and columns are shorted before power on.

5. Setup Python
Go to python-keyboard to setup Python on the keyboard. It only requires 100 lines of code to make the keyboard work with USB & Bluetooth.
